HackOTG (v1.0): A universal, portable, security-platform
When demonstrating a possible attack vector to a friend or a client, you want something standalone that is not influenced by your day-to-day tasks. Many have a persistent Kali Linux on a bootable USB-drive exactly for this purpose. There are also many attack-vectors which require physical devices. Exploits like DNS-tunneling, HID-attacks and BadUSB are only a couple of examples.
You can buy specific devices like the USB rubber ducky to perform these attacks in an easy, portable, quick way. Apart from being quite costly, you can’t carry them all in your everyday backpack and they often require to be reprogrammed for a different attack on the same vector… So having multiple will only make it worse.
I’ve ported a lot of my physical exploits and some wifi-exploits to my Android device. It’s disguised, an all-in-one and you’ll always have it on you. An OTG-cable in my backpack and I’m ready to go… But often a lot of these exploits require a custom kernel or some modules to be able to function. Many tweaks are also device specific. When there is an update, a lot of unexpected things can happen. Not the best solution.
So I was searching something open-source, portable, inexpensive, expendable, easy-to-mod and easy to interface with and change it behavior and I found this:
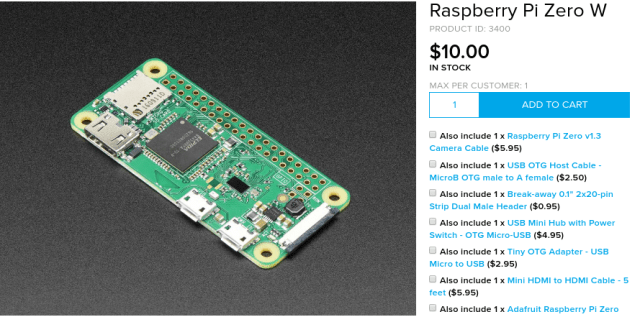
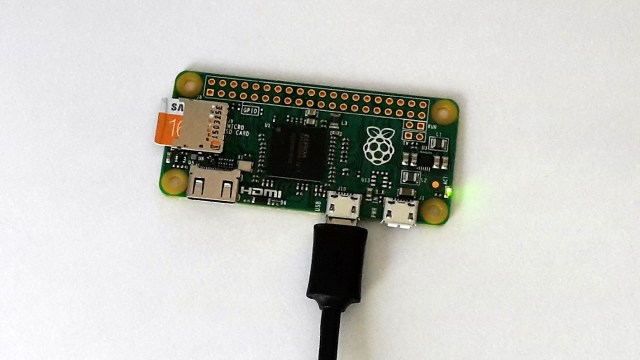
It is essentially a small stand-alone computer, running Linux of an SD-card. What is cool about this model is, that it has WiFi and Bluetooth and a board-setup configured to support USB-gadget or OTG mode. Which can change one of the micro-USB ports in whatever USB-device that you want (HID, Ethernet Dongle, Mass-storage, MIDI, … ). It is powered with a normal 5v micro-USB cable plugged in a USB-device or wall-adapter.
We can set it up as a headless device that we can ssh into over a WiFi-signal or even easier, making it emulate an ethernet device. The rest of this article will describe how to get it to emulate an Ethernet to USB controller and SSH’ing into it without ever attaching a display.
Preparing the SD-card
The software that is best adapted to the hardware is Raspbian. You can try to do the same steps on other ARM OS-distro’s, but from my experience they lack a lot of support for OTG. The idea is to make a very-easy-to-recreate setup so if it is not your favourite flavour of linux, no worries.
There are many ways to install Raspbian, but you basically download the diskimage and write it to the SD-card. if your SD-card is bigger than the original disk-image, expand the partition to its full size. In this article you’ll find a guide how to do this on Linux.
A SD-card in a raspberry pi consists of 1 small FAT-partition with boot files and 1 large EXT4-partition. Recreating the partition table and copying the right files on each will also give you a working system (but Raspbian gives you a ready disk-image).
Download the Raspbian Lite-image: (You don’t need te full one)
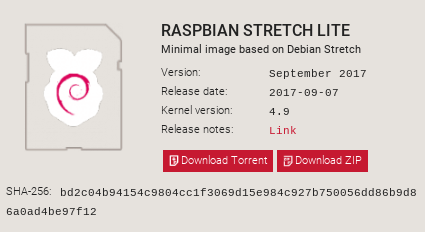
wget https://downloads.raspberrypi.org/raspbian_lite_latest
unzip raspbian_lite_latest #will unzip an .img file
Flash your SD-card:
Plug your SD-card in your pc with an card-reader. Your SD-card size and type matter, but are not that important. You want a fast one (indicated by its class, 10 is best) and anything above 2 gb will work well if using the lite-image. If you deploy this somewhere and it has to record or log something, make sure that it has disk-space to do so. At the time of writing a quality SD-card of 32 gb is 20 EUR, so that would bring the total cost to ~30 EUR excluding cables (which you probably have too much of).
Double-check before running these commands!
fdisk -l #lookup the device name of your SD-card (ex. /dev/mmcblk1)
Disk /dev/mmcblk1: 29.8 GiB, 32026656768 bytes, 62552064 sectors
Units: sectors of 1 * 512 = 512 bytes
Sector size (logical/physical): 512 bytes / 512 bytes
I/O size (minimum/optimal): 512 bytes / 512 bytes
Disklabel type: dos
Disk identifier: 0x00000000

Device    Boot Start End      Sectors  Size  Id Type
/dev/mmcblk1p1 8192  62552063 62543872 29.8G c  W95 FAT32 (LBA)
dd bs=4M if=2017-09-07-raspbian-stretch-lite.img of=/dev/mmcblk1 conv=fsync #change /dev/mmcblk1
442+1 records in
442+1 records out
1854590976 bytes (1.9 GB, 1.7 GiB) copied, 99.8628 s, 18.6 MB/s
Resize partition to full disk: (Optional)
fdisk /dev/mmcblk1 #change /dev/mmcblk1 to your device
Welcome to fdisk (util-linux 2.30.2).
Changes will remain in memory only, until you decide to write them.
Be careful before using the write command.
Command (m for help): p
Disk /dev/mmcblk1: 29.8 GiB, 32026656768 bytes, 62552064 sectors
Units: sectors of 1 * 512 = 512 bytes
Sector size (logical/physical): 512 bytes / 512 bytes
I/O size (minimum/optimal): 512 bytes / 512 bytes
Disklabel type: dos
Disk identifier: 0x11eccc69
Device Boot Start End Sectors Size Id Type
/dev/mmcblk1p1 8192 93813 85622 41.8M c W95 FAT32 (LBA)
/dev/mmcblk1p2 94208 62552063 62457856 29.8G 83 Linux
Command (m for help): d
Partition number (1,2, default 2): 2
Partition 2 has been deleted.
Command (m for help): n
Partition type
 p primary (1 primary, 0 extended, 3 free)
 e extended (container for logical partitions)
Select (default p): p
Partition number (2-4, default 2): 2
First sector (2048-62552063, default 2048): 94208
Last sector, +sectors or +size{K,M,G,T,P} (94208-62552063, default 62552063):
Created a new partition 2 of type 'Linux' and of size 29.8 GiB.
Partition #2 contains a ext4 signature.
Do you want to remove the signature? [Y]es/[N]o: n
Command (m for help): w
The partition table has been altered.
Calling ioctl() to re-read partition table.
Syncing disks.
At this point you will have a working operating system.
Configuring the device
Now that you having a working image, it is time to change some files with settings to make you able to connect to it. This will be achieved by configuring the OTG-port (micro-usb port marked with “USB”) to emulate an Ethernet-to-USB dongle. With a working connection, we will be able to log in through SSH.
Mount both partitions:
mkdir boot
mount /dev/mmcblk1p1 boot
mkdir root
mount /dev/mmcblk1p2 root
Setup USB-gadget, Ethernet-to-USB:
Add a line to boot/config.txt, using this command;
echo 'dtoverlay=dwc2' >> boot/config.txt
After the command ‘rootwait’ in boot/cmdline.txt add the following command (keep it as one line);
# boot/cmdline.txt
... rootwait modules-load=dwc2,g_ether ...
This will load the kernel-module needed and emulate a Ethernet-to-USB device on the USB port. You can also change this after the device is booted, but we have no other way of accessing the device, so we want this behavior on boot.
Configure a static IP:
Open the file root/etc/network/interfaces and add the following snippet to the end of the file:
# root/etc/network/interfaces
allow-hotplug usb0
iface usb0 inet static
address 192.168.7.2
netmask 255.255.255.0
network 192.168.7.0
broadcast 192.168.7.255
gateway 192.168.7.1
If the device is connected with its emulated ethernet-device, we will know its IP without using a DHCP-server or discovery-service.
Enable SSH-server (headless way):
SSH-server was enabled on the early versions but there was a security issue for many people who were not aware of this. To make it easy to enable this feature you can put an empty file named ‘ssh’ on the boot partition and it will enable it for you (the file will be gone after).
touch boot/ssh
Unmount the SD-card:
sync
unmount boot root
Using the device
If everything is set up correctly, you can use a micro-USB to USB-A (regular charging cable) to connect your device with the “USB” marked port to your computer (or any other device with a terminal). The connection will give both a 5V power and a data-connection to your Pi. After plugging the device in, the ACT light will start blinking if the SD-card has a bootable operating system on it. The first time the boot up process will take longer, but normally this takes about 10 seconds.
On Linux, you can check your interfaces by issuing the command:
ifconfig
If everything is working properly, you’ll see this new interface;
...
usb0: flags=4163<up,broadcast,running,multicast> mtu 1500
     inet6 fe80::a8ac:4ff:fe31:3a2e prefixlen 64 scopeid 0x20
     ether aa:ac:04:31:3a:2e txqueuelen 1000 (Ethernet)
     RX packets 28 bytes 3312 (3.2 KiB)
     RX errors 0 dropped 0 overruns 0 frame 0
     TX packets 5 bytes 734 (734.0 B)
     TX errors 0 dropped 0 overruns 0 carrier 0 collisions 0
...</up,broadcast,running,multicast>
To be able to SSH to the device we will need an IP ourselves. There is no DHCP-server on this 2-man network so we will give us one ourselves (in the same netmask). Use this command: (You’ll have to do this every time you plug in the device)
ifconfig usb0 192.168.7.3
Now you can SSH to this device with the default credentials (user: pi, pass: raspberry):
ssh [email protected]
What next?
Now that we have the basics figured out, in the next version we will hack the hardware to make the device include a USB-port so it is truly portable.
In the rest of the series we will start building our universal hacking/debugging tool so we can connect to it over WiFi and use its emulation capabilities to demonstrate physical attack-vectors.
You can find the next one here: