HackOTG (v1.1): Integrating the cable for more portability

This article is part of a series: you can find the first article here.
Before we start using our device, we have to make sure it is a good form-factor for our purpose and at this point, we will always need a USB-cable attached to the device, to be able to interface with it. In the future we will sometimes want to connect with WiFi so we can use the same connection to emulate different devices for our physical attacks.
No matter what, we will need the cable attached to it, be it for power, connectivity or attack. There are handy connections on the bottom of the Pi zero to make the following process easier. If you don’t want to perform this mod, you don’t need to, but it is very handy and makes the whole platform more compact and portable.
What do you need?
- Soldering iron, solder and tweezers (small wires)
- Pi zero
- Spare USB-cable
- Small zip tie
- Knife
- Pliers
- Glue
Putting it all together

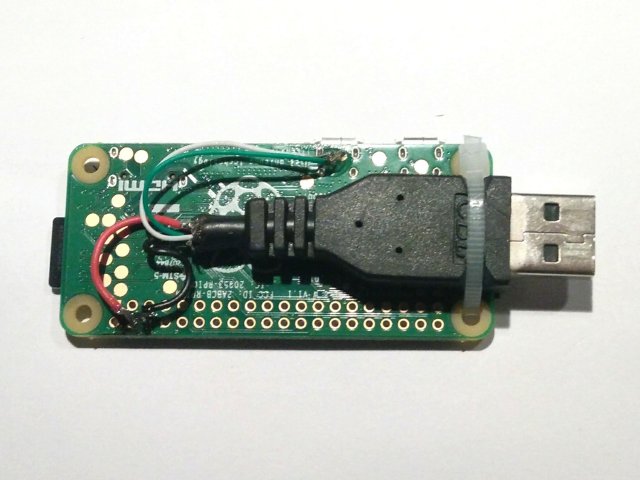
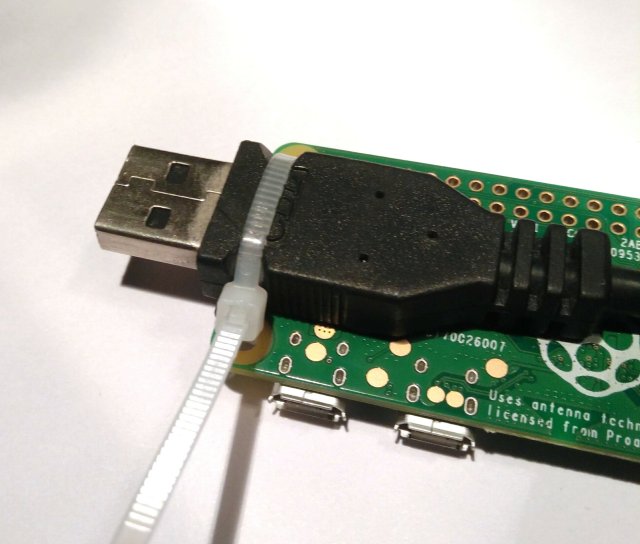
No surprises here, snip of the USB-A side, strip the cable from the black plastic layer, and you’ll find a metallic shielding layer with 4 cables in it (white, green, red, black). Those are 2 data-cables and 2 for power. If you make 2 small indentations on both sides of the USB-port, you can tie a cable-tie around it and through the holes. Pull the cable-tie very tight (use pliers) and it wont move anymore.
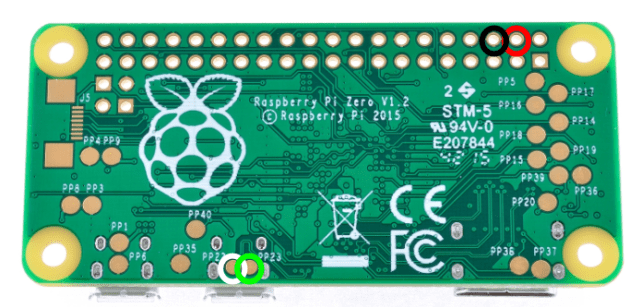
Solder the cables to the pads with respective indicated color on the image below. The cables can be as short as 5cm. You can drop a bit of glue onto the wires to insulate them form each other again.

The result and what’s next?
Now you don’t have to carry a USB-cable together with the Pi, it is already integrated in the device! If you plug it straight into a power source (battery, wall-socket, …) it will boot. And if the device is also a USB-host, it will present itself as an Ethernet-to-USB adapter and we can SSH into it to perform our work. Now we can start using our HackOTG everywhere!

You can find the next one here: